Java is one of the most widely used programming languages, powering countless applications and systems across the globe. Whether you’re a budding developer or an experienced programmer, installing Java on your operating system is the ultimate first step toward unlocking its capabilities. This blog provides the ultimate guide on how to install Java on Windows, Linux, and macOS, ensuring you’re set up for success in any environment.
Installation of Java on Windows
Download Java:
- Visit the official Java Downloads Page.
- Select the version compatible with your system architecture (32-bit or 64-bit).

Install Java:
- Run the downloaded
.exefile. - Follow the on-screen instructions and choose the installation directory (default is recommended).
Set Environment Variables:
- Path is required for using tools i.e., javac, java etc.,
- For setting path permanently, perform these steps->
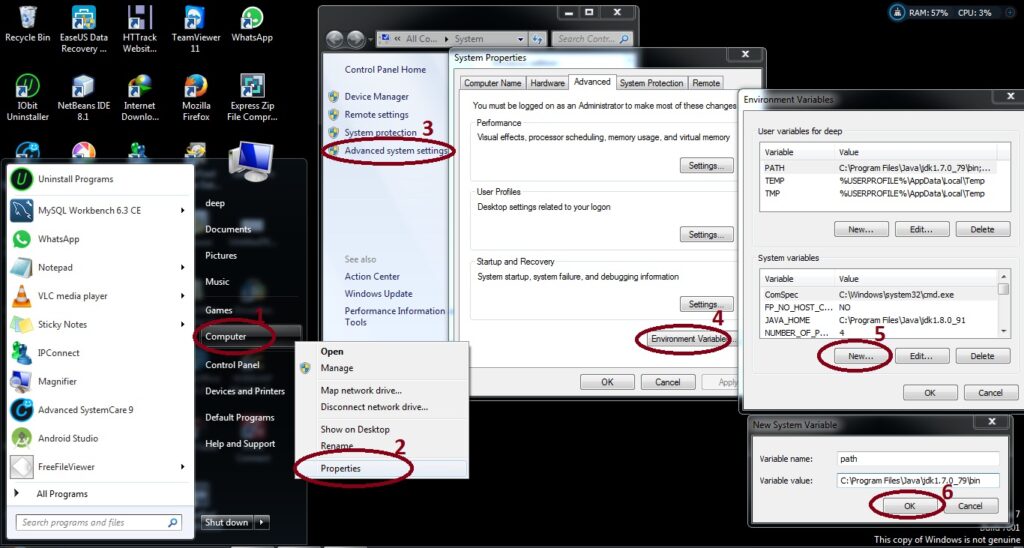
- Go to My computer/This PC ‘properties’ -> ‘advanced system settings’ -> ‘Environment Variables ‘-> ‘New’: it should be like following:
“Variable name: path

“Variable Value: (path of bin folder of JDK) i.e. C:\Program Files\Java\jdkX.X._XX\bin
Verify Installation:
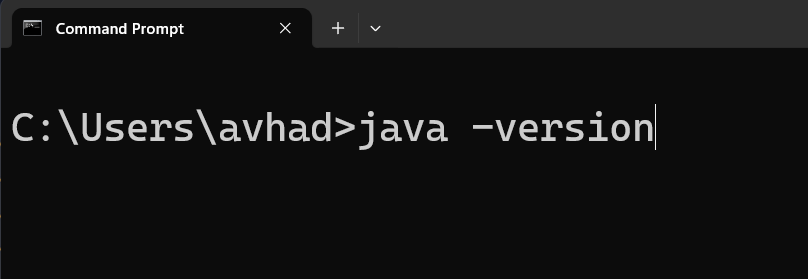
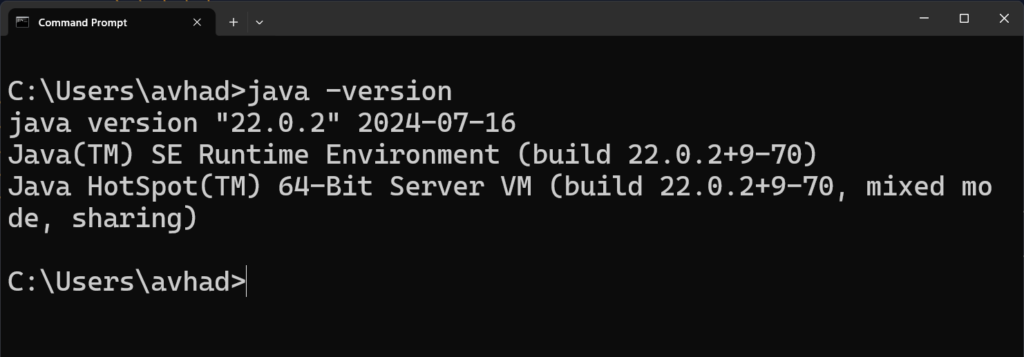
- Open Command Prompt and type
java -version. - If installed correctly, it will display the installed Java version.


Installation of Java on Linux
Update Package Repository:
- Open a terminal and run:
sudo apt update
sudo apt upgrade
Install OpenJDK (Preferred for Linux):
- Run the following command to install OpenJDK:
- Replace 17 with the desired Java version.
sudo apt install openjdk-x-jdkSet JAVA_HOME (Optional):
- Open the .bashrc or .zshrc file in your home directory:
nano ~/.bashrc- Add the following lines:
export JAVA_HOME=/usr/lib/jvm/java-11-openjdk-amd64
export PATH=$JAVA_HOME/bin:$PATH- Save and apply changes:
source ~/.bashrcVerify Installation:
- Type
java -versionin the terminal to confirm the installation.
Installing Java on macOS
Download Java:
- Visit the Java Downloads Page and download the macOS installer.
Install Java:
- Open the downloaded .dmg file and follow the installation wizard.
Set JAVA_HOME (Optional):
- Set JAVA_HOME (Optional):
nano ~/.zshrc- Add the following:
export JAVA_HOME=/Library/Java/JavaVirtualMachines/jdk-xx.x.x.jdk/Contents/Home
export PATH=$JAVA_HOME/bin:$PATH- Save and apply changes:
source ~/.zshrcVerify Installation:
- In the terminal, run
java -versionto check if Java is installed correctly
Conclusion:
Installing Java on your operating system is a straightforward process when guided step-by-step. Whether you’re using Windows, Linux, or macOS, this guide ensures a seamless setup experience. With Java installed, you’re ready to dive into coding, develop robust applications, or explore the vast Java ecosystem. Don’t forget to share your experience and let us know if you face any challenges—we’re here to help!

Автоматизированное продвижение хрумером помогает увеличить количество внешних ссылок.